Barrette Structural Distribution offers a downloadable version of the TRIFORCE® Installation Guide accessible at any time on its website. Available in English, Spanish and French, the guide is designed to answer jobsite questions and is a natural complement to the TRIFORCE® Specifier Guide.
While we’re on the subject of installation, let’s take this opportunity to provide a few tips for installers and designers related to successful TRIFORCE® floor framing.
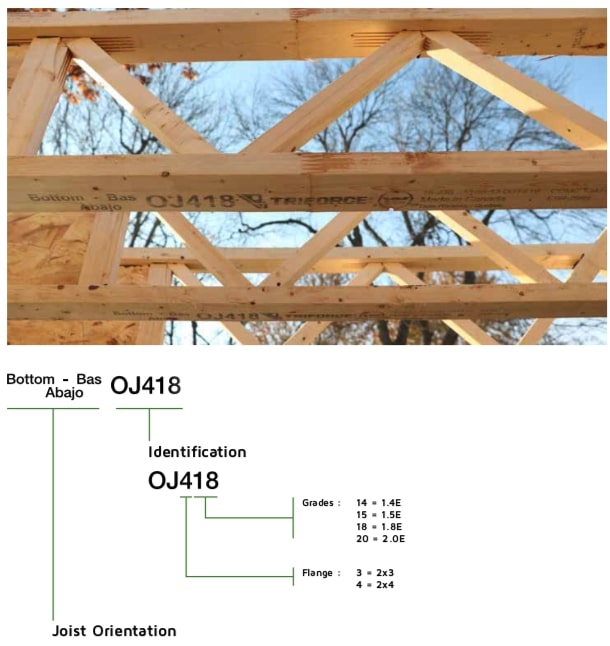
Joist Identification and Orientation
Each TRIFORCE® joist has a top and a bottom. Proper orientation is marked on the joist and framers should abide by these markings to ensure correct installation and to achieve maximum shear capacity. And, it’s a good idea to confirm correct orientation before decking is installed and mechanical systems have been run. But, even if installation errors are discovered, in most cases, upside-down installation presents no problems related to joist performance and, if needed, “fixes” are available.
Plumbing Drops
Before joist installation begins, a few minutes of comparing joist placement plans and mechanical systems installation layouts can help avoid future delays and headaches. At this stage, there is an opportunity to discover possible conflicts with access openings for mechanical systems (such as plumbing drops) and TRIFORCE® joist locations.
During the design phase, a designer can often shift joists or alter spacing to avoid conflicting with MEP locations. The intent is to avoid having to cut, drill or notch a joist in order to accommodate system installations. When joists are violated, a repair is required, meaning extra costs and job delays. It’s also a good idea to make a point of warning MEP installers not to alter TRIFORCE® joists.
Joist Direction
TRIFORCE® open joists feature a trimmable end with an I-Joist configuration and an opposite end with a 2X3 vertical block. It is recommended that the end with the 2X3 be installed on the straightest wall or beam run. This will ensure that the joists…and open spaces…line up from joist to joist. Then, mechanical systems can be installed in the least amount of time, allowing these systems to operate with optimum efficiency.
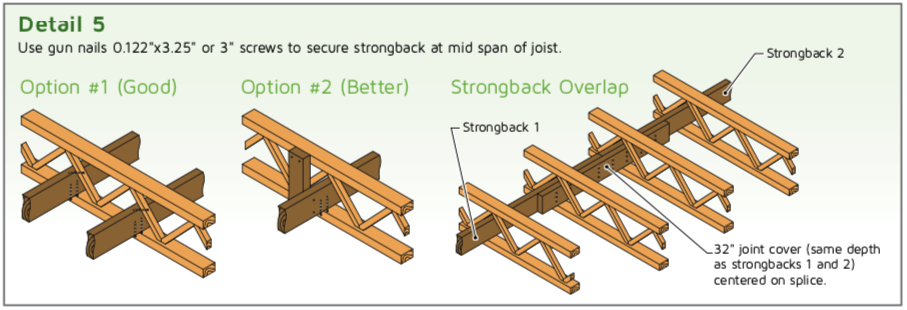
Strongback Bridging
Framers will find that the best time to install strongback bridging within the floor system is during installation of the joist run and before decking is attached. This allows easiest access for inserting and attaching the strongbacks, which are so important to vibration control and overall floor performance.
Strongbacks must be of dry lumber and installed as close as possible to mid-span, as per Detail 5 below, and can be cut between two joists for ducts or pipes, if needed.
Glad to Help
Barrette Structural Distribution is happy to offer these tips to help ease installation of TRIFORCE® floor joists so that end users may enjoy the full benefits of TRIFORCE® floor systems. Refer to the Installation Guide for additional information. Our guidance is designed to help you provide peace of mind underfoot!